Showing posts with label Bake 52. Show all posts

Wednesday, December 19, 2012

Bake 52: Almond Biscotti

It's hard to believe that this year is almost over. It has flown by. This is my last week to host in Bake 52, and I chose Almond Biscotti. I have never tasted biscotti. I'm glad I decided to try it, because I thought it tasted great. I can see now why they often accompany a warm drink, though, because they are crisp, crisp, crisp! They won't be an all-the-time cookie for me, but I think I'll make them now and then in the winter to have with my hot chocolate. I made the almond flavor, but there are several variations at the end of the recipe, and I'm sure countless more varieties.

Almond Biscotti 
Makes about 3 dozen cookies
Biscotti are Italian cookies that are baked twice--the first baking actually cooks the dough, while the second baking makes the cookies crisp and dry. 

 
2 cups (10 oz) all-purpose flour
1 teaspoon baking powder
1/4 teaspoon salt
4 tablespoons (1/2 stick) unsalted butter, softened
1 cup (7 oz) sugar
2 large eggs
1/2 teaspoon vanilla extract
1/4 teaspoon almond extract
3/4 cup (3 3/4 oz) almonds, toasted and chopped coarse
2 tablespoons grated fresh orange zest (optional)


Toasting the almonds.
Nice golden, toasted almonds.

Beautiful orange zest & chopped almonds.
I used the orange for an air freshener. I sliced it up, added water, and simmered it. You could also add a cinnamon stick or vanilla for a different scent.
 1. Adjust an oven rack to the middle position and heat the oven to 350 degrees. Line a large baking sheet with parchment paper. Whisk the flour, baking powder, and salt together in a medium bowl.
 

2. In a large bowl, beat the butter and sugar together using an electric mixer on medium speed until light and fluffy, 3 to 6 minutes. Beat in the eggs, one at a time, then the vanilla and almond extract until combined, about 30 seconds, scraping down the bowl and beaters as needed.
      

3. Reduce the mixer speed to low and slowly mix in the flour mixture until combined, about 30 seconds. Mix in the almonds and zest (if using) until just incorporated.
4. Press the dough into two 13 by 2-inch loaves on the prepared baking sheet, spaced about 3 inches apart. Bake the loaves until golden and just beginning to crack on top, about 35 minutes (mine was done in 30), rotating the baking sheet halfway through baking.


5. Let the loaves cool on the baking sheet for 10 minutes. Lower the oven temperature to 325 degrees.


6. Transfer the loaves to a cutting board and slice each on the diagonal into 1/2-inch-thick slices with a serrated knife. Lay the slices about 1/2 inch apart on the baking sheet and bake until crisp and golden brown on both sides, about 15 minutes, flipping the slices over halfway through baking. Transfer the biscotti to a wire rack and let cool completely before serving, about 1 hour.

                       
I planned on dipping the tops in chocolate, but I overheated it and didn't have any more to melt :(
Variations:
PISTACHIO BISCOTTI - Omit the almond extract and substitute shelled, unsalted pistachios, toasted and shopped course, for the almonds.
CHOCOLATE CHIP BISCOTTI - Omit the almond extract and substitute semi-sweet chocolate chips for almonds.
 LEMON-ANISE BISCOTTI - Omit the almond extract and almonds. Add 1 tablespoon anise seed with the vanilla extract and substitute 1 tablespoon of fresh lemon zest for the orange zest. 

These made great neighbor gifts with a cute packet of hot cocoa.

Thursday, December 13, 2012

Bake 52: Glazed Chocolate Cream Roll

So, I made the cake and took pictures, then forgot to blog last night. Sorry to be a day late on this one. You can get the recipe for this cake on Michelle's blog. After trying my cake, I never wanted to make it again. Not because it was hard to do or took too long (it was actually pretty fast and easy), but because I didn't think it tasted great. Now, after reading through the other bakers' blogs, maybe I do need to try it again because they seemed to like theirs.

I'm not sure if I over-baked the cake or what, but it was dry and had kind of a rough texture. I like my cakes dense, soft and fluffy. The marshmallow filling was good, but I might decrease the amount of butter next time. Or better yet, use ice cream like Amanda did.

My favorite part of this recipe was the chocolate glaze. In fact, when Nick brought slices out for dessert last night, I ate all the glaze off the top, then handed the rest off to him. It wasn't his favorite cake, either, but it's a dessert, so he'll eat it anyway :)

It did look very pretty sitting on the platter covered in shiny glaze. The side-view picture doesn't look great - I need to perfect my tight-rolling technique - but it looked much better on the slices toward the middle.
 

Wednesday, December 5, 2012

Bake 52: Large Danish Braid

Jennifer chose this week's recipe, and it wasn't one I should have procrastinated making until today. Not because it took a long time (which it did), but because it was so super yummy!  I have never been fond of danishes. I think it's because most of them have cream cheese, and I don't like cream cheese. Now that I can make them myself and leave out the cheese, I could eat them all day. I want to try this in every flavor, shape and size.

The book suggested 4 different fillings: apricot, prune, cream cheese, and cheese & cherry. You know cream cheese was out for me, but cross out the cheese before cherry, and we're talking! But I didn't have cherries in my pantry, and I didn't want to go to the store. So I improvised with frozen fruit I had in the freezer. Here is my blueberry, blackberry, raspberry, strawberry danish:
I was grateful to have seen Jennifer's post before assembling it. Thanks to her, I mostly avoided an over-juiced danish, but not completely. I strained my fruit, then put a few spoonfuls of juice on top. I should have gone without the spoonfuls.

I was running out of time, so I skipped the 30-minute rising step. It's a little on the flat side. But other than a few glops of frosting, the presentation's not bad.

When you've got a day to hang out at home and roll out the dough several times throughout the day, I suggest you try making this. You can get the recipe on Jennifer's blog.

Wednesday, November 28, 2012

Bake 52: Buttermilk Biscuits

This week we made buttermilk biscuits. I love buttermilk biscuits, and this is the best recipe I've made. They had a great flavor, even though I used regular buttermilk rather than powdered. The only problem I had with them was that they went into the oven perfectly formed, and came out all crooked and misshapen. I'll have to work on figuring that out. 

I thought they were light, fluffy and had great flavor. I didn't think they would be as good the next day, but they were still as yummy even 2 days later. I will certainly hold on to this recipe. You can find it on Betsy's blog.


As an added bonus, we ate kiwis with our dinner and mine was full of love!

Wednesday, November 21, 2012

Bake 52: Sweet Potato Pie

This week Talesha chose Sweet Potato Pie for her recipe. A great pick for Thanksgiving.

I never knew that sweet potatoes and yams are the same thing. I've never bought or eaten them before. Wait, I'm having a flashback of a college roommate making me try a sweet potato once . . . but it wasn't a pie, so it's bound to taste better this time, right?

Mine looks pretty, but we haven't tasted it yet since we thought we'd take it up to Philly with us for the big day. I'll let you know what it tasted like tomorrow.

Update: We tried the pie. We thought it was okay. A little bland. Couldn't compare with pumpkin. The crust was a little tough, which may be from overworking it, or it might just be a tougher dough. 

Happy Thanksgiving!
Find the recipe HERE.

Wednesday, November 14, 2012

Bake 52: Pumpkin Spice Cheesecake

Nick was very excited to hear what this week's recipe was. Cheesecake is his favorite dessert. And he gets it all to himself in this house :) I'm not a cheesecake person, but it was nice to finally make one for him! 

For my first-ever cheesecake, I think it turned out pretty well. I did not have a roasting pan, so I just stuck it in the oven without it. Unfortunately, some liquid seeped out of the spring form pan and smoked for the rest of the baking since I couldn't get in there to clean it up with the cheesecake baking. Since I didn't do the water bath, the top probably cracked and fell and little more than it might have, but it seemed to work out okay without it. 

For the 45 min. it was supposed to be out of the oven but still in the water bath, I just turned the oven off and let it sit in there for about 20 minutes. 

Nick's answer when I asked how it was: "Well, it's cheesecake, and it's pumpkin. Together." I took that to mean it wasn't the best cheesecake he's ever eaten! When I asked him for more explanation he came up with a gem. "I like cheesecake, and I like pumpkin pie. With them together it's like the cheese dilutes the pumpkin, and the pumpkin dilutes the cheese. It's cheesecake, but it's not. Like Renesme - she's a vampire, but she's not." 

So there you have it, folks. Pumpkin Spice Cheesecake - Vampire style (or not)
Go to Amanda's blog for the recipe. She says it's better as second-day cheesecake :)

Thursday, November 8, 2012

Bake 52: Red Velvet Layer Cake

I enjoy making layer cakes. Sometimes they turn out, and sometimes they don't. But when they do, it is very satisfying to see how pretty it is :)  I thought this cake turned out pretty well. The one thing I like about red velvet cake is the color of it. My color was a little pale because I didn't have regular food coloring, only the gel kind, so I wasn't sure how much to put in. The flavor of red velvet for me has always been 'eh'. 

This recipe came out with a great texture and a subtle flavor. I used the Vanilla Frosting recipe from the book. It's the first frosting recipe from the book that I would actually eat, though it's still not my favorite.

If you'd like to give it a try, head over to Janet's Blog for the recipe.


Wednesday, October 31, 2012

Bake 52: Apple Dumplings

This week was my turn to host. Since I knew everyone would be in the thick of Halloween, I went straight to the "Shortcut Baking" section of the recipe book. The apple dumplings sounded  appropriate for Fall, and looked quick to make. Plus, with all the candy to be consumed, eating a dessert made with half an apple seemed at least partly healthy ; )
I felt the dumplings were simple to make and had a fancy presentation. It may become a go-to dessert when we have company over. Hope you like it!

Apple Dumplings

Serves 4

This recipe uses refrigerated crescent dinner rolls as the pastry that wraps around the apples. We prefer Pillsbury’s Refrigerated Crescent Dinner Rolls, but any 8-ounce can of crescent dinner roll dough will work. Folding and rolling the dough ensures that the seams will not break open during baking. Serve with vanilla ice cream or a drizzle of heavy cream.

1 (8-ounce) can refrigerated crescent dinner rolls
2 small granny smith apples, peeled, cored, and halved crosswise
2 tablespoons unsalted butter, cut into 4 pieces
½ cup packed plus 2 tablespoons light brown sugar
¼ teaspoon ground cinnamon
1 cup apple cider 
Everything you need for the recipe!
Nick used a spiral apple cutter to make the peeling and coring quick and painless.

I think having the apple sliced made it easier to eat than it might have been unsliced.


The spiral-cut peel was also the perfect treat for the other member of our family : )
Cinnamon & brown sugar ready to go.
 1. Adjust an oven rack to the middle position and heat the oven to 350 degrees. Line a large rimmed baking sheet with parchment paper.

2. On a lightly floured counter, carefully unroll the entire can of dough, keeping the perforations intact. Cut the dough into four 6 by 3 ½-inch rectangles (do not tear the diagonal perforations). Fold each rectangle in half and roll out to a 6-inch square.
I used large apples because I couldn't find small, so I bought the "big" crescent rolls to compensate.
Fold.
Rolled 6-inch squares.
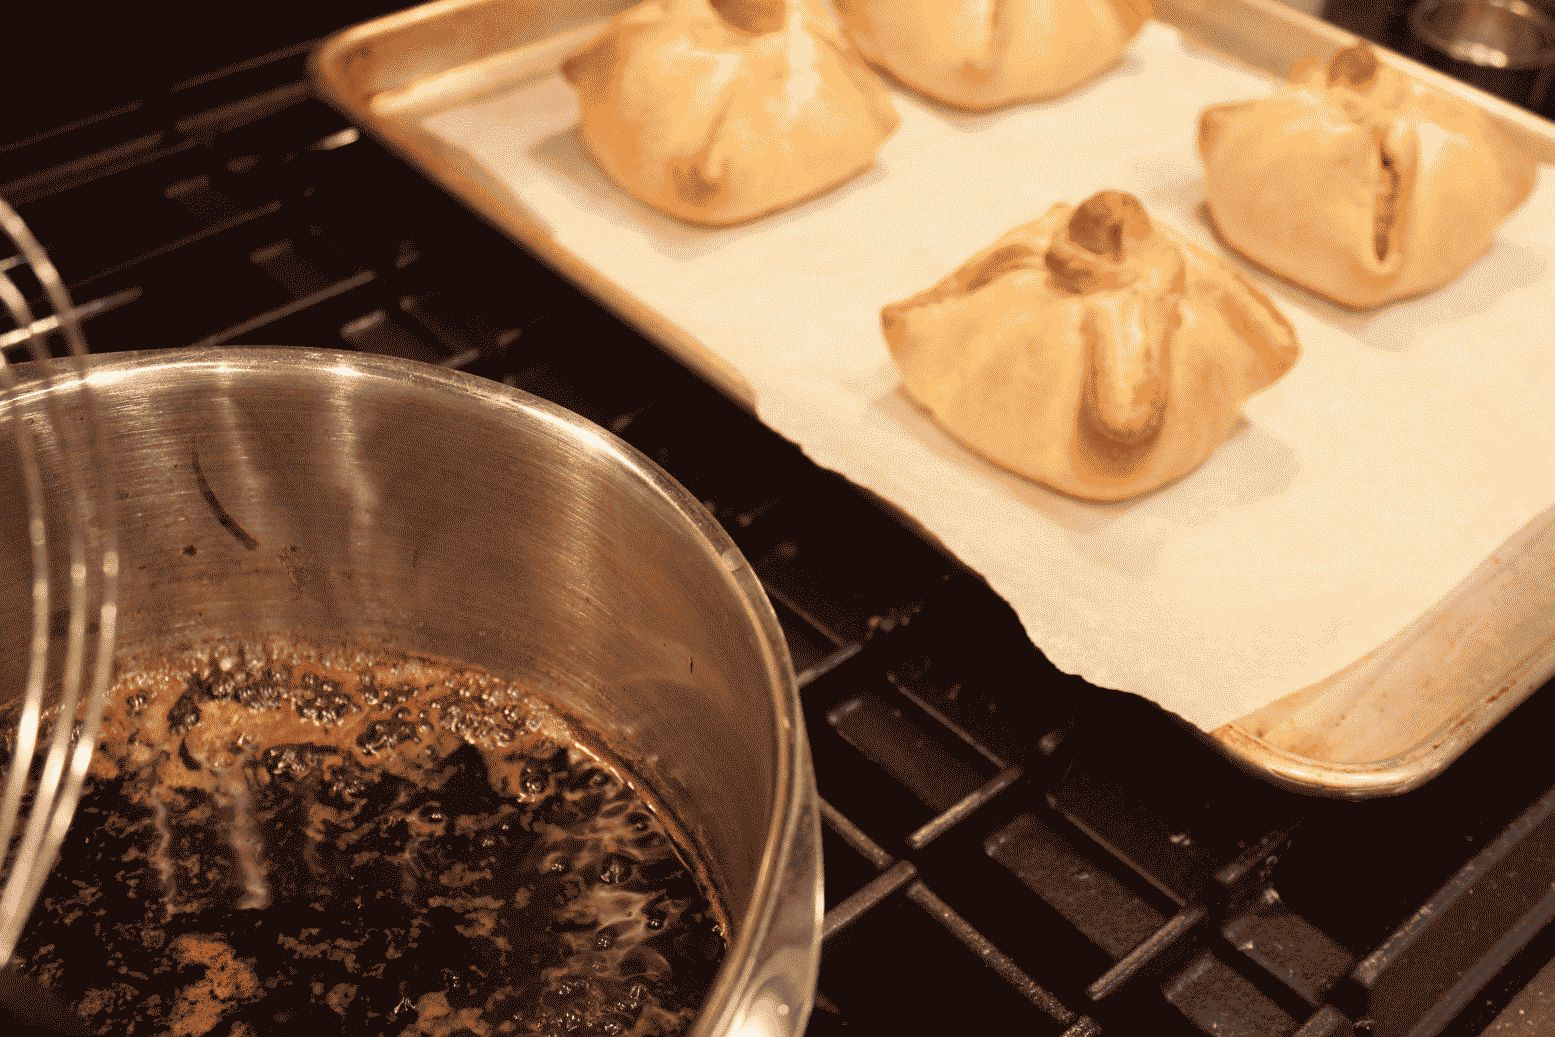
 3. Place an apple half, cut side down, in the center of each dough square and place a piece of butter in the center of each apple. Toss 2 teaspoons of the brown sugar with the cinnamon and sprinkle over the apples. Pull the edges of the dough up over the apple, twisting the dough ends to form a knot at the top.


I thought this would be harder to do than it was.
 4. Transfer the dumplings to the prepared baking sheet and bake until the crust is golden brown and the apples are tender but not mushy, 20 to 25 minutes, rotating the baking sheet halfway through baking.

These were so incredibly pretty! I wish I'd poked the apples, though, because they could have used another minute or two to soften up.

5. While the dumplings bake, simmer the apple cider and remaining ½ cup brown sugar together in a small saucepan over medium-low heat until the sauce is slightly thickened and measures ½ cup, about 15 minutes.


6. Immediately transfer the baked dumpling to individual serving plates or shallow bowls. Pour 2 tablespoons of the cider sauce over each dumpling and serve.
Super pretty presentation with the sauce drizzled on top.
Next time I'll leave out the butter. I don't think it was very necessary - mine didn't even totally melt!

Since I used the larger apples and dough squares, these were perfect for slicing in half and serving with ice cream.
 TO MAKE AHEAD: The baked dumplings can be held at room temperature for up to 30 minutes before serving with the warm sauce.

Wednesday, October 10, 2012

Bake 52: Strawberry Poke Cake (oops!)

I'm not exactly sure what happened with this week's recipe. Since I didn't make the eclairs last week, I planned on making this week's recipe ahead of time. I checked and re-checked the recipe list before going to the store to get the ingredients. Somehow between then and now either the list changed or my eyes were playing tricks on me, because Strawberry Poke Cake is no longer on the list. Everyone else seems to have made the Pumpkin Sheet Cake, so apparently I'm the only one going crazy here.

On the bright side, the strawberry cake was delicious. You should all try it. I hadn't planned on posting the entire recipe, though, so you can only make it if you have the cook book ; ) One thing to plan for with this recipe is how long the cooling and chilling processes is. 2 hours to cool, then 3 more to chill. Mine only chilled for 1 hour, because I couldn't wait to eat it.

The strawberry puree on top is DELICIOUS. I licked the bowl clean after pouring it on the cake. Yum. Since it's made with frozen strawberries, it's an easy way to have a summery treat in the middle of winter.

Betsy hosted the Pumpkin Sheet Cake this week, so you can find the recipe on her blog.  It looks really good from what I've seen, and I look forward to making it one of these days.

Wednesday, September 26, 2012

Bake 52: Spiced Pumpkin Bread

Just in time for Fall, Talesha picked one of my favorite seasonal treats. Check out her blog for the recipe.
The bread was quick to mix up, baked beautifully, and was super moist. I made mine in three small loaf pans so that we could freeze some for later and not eat the entire loaf in one day!
I also left out the nuts and cranberries because I don't really like them in bread, but wish I'd tried some chocolate chips in at least one loaf to see what it tasted like.

Wednesday, September 19, 2012

Bake 52: French Toast Casserole

This recipe sounded great. The only questionable thing to me was letting the bread soak in the egg/milk mixture for up to 24 hours. Even after toasting the bread to dry it out, I worried about it coming out soggy. That is exactly what happened. It had a sweet, crisp top and bread pudding underneath.  

I am curious to try this recipe again and experiment. I may try halving the liquids and baking it right away rather than letting it sit. That could lead to disaster, but I'm willing to try. I'll let you know if I ever do it.

If you're a bread pudding kind of person, this recipe might just be for you.  Head over to Valerie's blog for the recipe.


Wednesday, September 12, 2012

Bake 52: Deep-dish Pepperoni Pizza

Thank you, Amanda, for choosing my favorite food for this week's recipe! As someone who grew up eating Pizza Hut pizza quite a bit, I was unsure about how this pizza would compare. 
It was great! We had to hold ourselves back from eating both in one night.

It's a deep dish, so you know there's gonna be an oily crust. I liked that the recipe had you microwave the pepperonis first to work out some of the grease from them. I used turkey pepperoni, so there wasn't much grease there in the first place.

If you like pizza, you should head to Amanda's blog and try out the recipe!